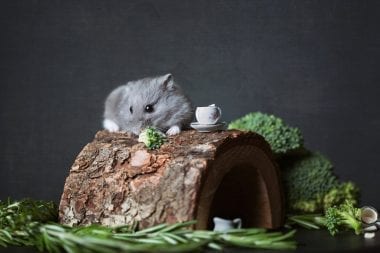
Hamsters are incredibly adorable house pets that make for very social companions. Hamsters are housed in cages that are a complete environment for the pets to eat, drink, play, and rest. Hamster cages are best designed to give your little furry friend accessible and safe spaces to sleep, nest, exercise, and nourish their bodies. Food and drinking stations are essential components of a hamster’s cage. Hamsters require clean drinking water to remain hydrated and healthy. A water bottle or a water dispenser can ensure a steady source of clean drinking water for your pet.
Hamsters usually drink water from water bottles attached to the sides of their cages. While most hamsters learn to drink water from a water bottle, some may drink water out of a water bowl. Water bowls will require more effort to keep clean. Water in bowls can be contaminated by food debris, bedding, or even hamster feces. Alternately, water from the bowl may spill and wet the bedding and food in the cage. The water in bowls must be consistently replaced as it gets dirty to ensure that your hamsters do not consume polluted or contaminated water. Water bottles remove these hassles and make caring for your hamster a much easier task.
But for anyone who shares their home with hamsters, you know how frustrating their little teeth can get. These critters are chewing machines and their tiny teeth will find anything in their cage a suitable chew toy. Hamsters’ teeth grow throughout their lifetime and chewing is one way they can keep the length in check. Water dispensers and bottles can be chewed through leaving a sizeable hole in your pockets every time you need a new bottle. A solution to this is to make your own hamster water bottle. A fairly simple DIY, this article will take you through how to make a hamster water bottle in eight easy steps.
Materials You Will Need
When looking for how to make a hamster water bottle, you will need some basic materials and tools. The materials for the bottle can even come from your recyclables. Old water bottles and pens can work wonderfully well for bottles and spouts.
As far as the size of the bottle is concerned, you will need to take into consideration your hamster’s water requirements in terms of breed and age. You will also need to pick a bottle depending on the size of your hamster’s cage. Larger hamster breeds and larger cages will require a bigger water bottle that can hold more water.
Always give your hamster fresh and clean drinking water. The water must be free of pollutants or contaminants. Unlike a bowl, a water bottle will ensure that there is no food debris, bedding, soil, or waste in your hamster’s water. Water is best served at room temperature. Avoid giving your hamster water that is too hot or too cold. Hot water can scald your hamster’s tongue, damage your bottle and leave mineral sedimentation on the inner walls of the bottle. Distilled, filtered, or bottled water is the best for your hamsters.
When thinking of how to make a hamster water bottle, you will need:
· A plastic water bottle with the cap on
· A rubber stopper with a hole
· A plastic or metal tube for the nozzle or spout
· A plastic, metal or glass bead or marble
· A marker, nail, and hammer
· A power drill machine with a ¼ inch or ½ inch drill bit depending on the size of your bottle and cap
· Silicone sealant
· Wires and a wire cutter
Steps for How to Make a Hamster Water Bottle
Step 1: Determine the size and type of your hamster cage
The size of the water bottle that you will require depends on the size and type of your hamster cage. Larger cages can accommodate larger water bottles with more water capacity. The sides of the cage will help you determine how to secure the water bottle in place. A cage with solid sides will require a bottle holder to hold the bottle on the ledge. Alternately, a wire-sided cage will require some wires or a holder to hold the water bottle in place. If using wires, a water bottle with ridges is ideal.
You will also have to account for your hamster’s breed and age to determine your hamster’s water requirements.
Step 2: Prepare the cap of the bottle
Remove the cap from your bottle and mark the center point on the inside of the bottle cap using a permanent marker. Place the cap on a strong surface. Using a hammer and nail, gently pierce the cap at the point you made in its center. The strong surface will ensure there is no damage if the nail goes through the cap. Once the cap is pierced, you can replace the cap back on the water bottle.
Step 3: Drill a hole in the cap
Once the cap is replaced on the bottle securely, you will need to drill a hole in the cap through the piercing or starter hole. Use a power drill and a ¼ or ½ inch drill bit depending on the size of the bottle and cap. Make sure to hold the bottle securely and drill slowly to ensure an appropriate hole size. Once you have drilled the hole in the bottle cap, remove the cap from the bottle.
Step 4: Fix the rubber stopper
Once the hole in the bottle cap is ready, you can fix the rubber stopper on the outside of the bottle cap using silicone. The hole in the rubber stopper must align with the hole in the bottle cap. The silicone adhesive will take a couple of days to dry out completely.

Step 5: Prepare the plastic or metal tubing for the spout
Once the stopper is attached to the cap, you can now prepare a spout or a nozzle for your hamster bottle. When you think about how to make a hamster water bottle that does not leak or drip, a tube for the spout or nozzle is essential. This tube will have a tiny plastic, metal, or glass bead, or marble that will act as a ball bearing. This will prevent the water from leaking out of the spout.
You can use a plastic tube, the body of an old pen, a metal straw, or a thin metal pipe to prepare the spout. The tube should be cut to an appropriate length that will be fixed to the rubber stopper on the bottle cap. Once you have cut the tube, you can insert a ball bearing in the form of a tiny plastic, metal or glass bead, or marble. Make sure that the ball bearing is not flush with the tube. Your hamster should be able to move or push the ball up the tube to allow water to drip for drinking.
Step 6: Fix the spout of the bottle
Once the tube is prepared, you can now fix the nozzle or spout of the bottle. Insert the tube into the rubber stopper until the tube is flush with the hole in the rubber stopper and cap. You can also bend the tube to an angle depending on its length and your hamster’s height. Most commercial pet water bottles have an angular spout.
Once the spout is fixed, wash the bottle well to remove any pieces or shreds of plastic that may have remained from drilling the cap. Once washed, ensure the bottle has dried thoroughly.
Step 7: Fill the water bottle
Once the bottle is washed and dried, fill it with clean room-temperature drinking water. A good tip is to squeeze the bottle slightly as you put the cap on it. Squeezing the bottle and the ball bearing in the spout will create a slight vacuum inside to prevent leakage or dripping. The bottle will be tied upside-down to the sides of the cage. The vacuum formed by the ball bearing is important to prevent water from seeping out of the spout.
Your hamster will press against the ball bearing in the spout and push it up the tube to drink water. Once your hamster has had water, the ball bearing will sit against the hole on the spout and prevent any leakage.
Step 8: Fix the water bottle to the hamster cage
Now that the water bottle is ready, you will need some wires to fix it to the cage. 10 or 12 gauge wires are best suited for fixing the bottle. Secure the cap of the bottle tightly and invert it. Tap the ball bearing a few times to stop the water from dripping. Once the vacuum is created, place the inverted water bottle on the inside of the cage a few inches up from the bottom. Bear in mind your hamster’s height. The spout of the bottle should face away from the cage wall and towards the inside of the cage.
Beginning from the middle of the wire wrap the bottle or its ridges from the center of the bottle to about an inch or two up from the base of the bottle. Twist the two ends of the wire where they meet and hold it over the edge of the cage. If the sides of the cage are wired, slip the wires holding the bottle in place out of the cage. Then wrap the wires around the cage tightly to secure the bottle in place. Ensure that the bottle isn’t positioned too low and is filled properly. Otherwise, your hamster may not be able to drink water.
Prevent leakages in your hamster water bottle by running your finger over the ball bearing and securing it in place. Clean the bottle regularly and replace the water inside to ensure a steady supply of fresh and clean drinking water.
This DIY project is fun to do and is very cost-effective. The next time you wonder how to make a hamster water bottle, follow these easy steps to make your very own. Not only is a DIY hamster water bottle cost-effective, but it’s also a great way for you to be involved in your hamster’s care and health.
